Introduction to Google Nest Thermostat (GA01334-US, GA02033-US)
Welcome to this comprehensive guide for your Google Nest Thermostat, covering models GA01334-US and GA02033-US. This smart thermostat is designed to help you save energy and enhance home comfort by learning your preferences and adapting to your schedule. Whether you're setting it up for the first time, optimizing its performance, or troubleshooting common issues, this guide provides all the essential information you need. For quick answers, check our Frequently Asked Questions.
1. Google Nest Thermostat Unboxing & Package Contents
Before you begin, ensure all components are present in your Nest Thermostat box:
- Nest Thermostat display
- Base plate
- Mounting screws and wall anchors
- Trim plate (optional, for covering old thermostat marks)
- Welcome Guide
2. Google Nest Thermostat Installation: Step-by-Step Guide
Installing your Nest Thermostat is a straightforward process, but it's crucial to follow these steps carefully to ensure proper functionality and safety.
2.1 Nest Thermostat Pre-Installation Checklist
- Turn off power: Crucially, turn off the power to your HVAC system at the breaker box. Verify it's off by trying to adjust your old thermostat.
- Check compatibility: Ensure your existing wiring is compatible with Nest. Most 24V systems are, but some older or high-voltage systems may require a professional.
- Take a picture of old wiring: Before disconnecting anything, take a clear photo of your old thermostat's wiring. This is your reference.
2.2 Removing Your Old Thermostat Safely
- Disconnect wires: Carefully label each wire with the provided labels (or your own tape) as you disconnect them from your old thermostat's terminals.
- Remove base plate: Unscrew and remove the old thermostat's base plate from the wall.
2.3 Installing the Nest Thermostat Base Plate
- Thread wires: Pull the wires through the center opening of the Nest base plate.
- Mount the base: Use the provided screws and wall anchors to securely mount the Nest base plate to your wall. Ensure it's level.
2.4 Connecting Nest Thermostat Wires
- Refer to your photo: Connect the labeled wires to the corresponding terminals on the Nest base. For example, if your old R wire was connected to R, connect it to R on the Nest base.
- Common wire (C-wire): While Nest Thermostats can often work without a C-wire, it's highly recommended for consistent power. If you have one, connect it. If not, Nest may use power stealing, which can sometimes lead to battery issues or system short cycling.
2.5 Attaching the Nest Thermostat Display
- Align and push: Gently push the Nest display onto the base until it clicks into place.
2.6 Nest Thermostat Power On & Initial Setup
- Restore power: Turn the power back on at your breaker box.
- Follow on-screen prompts: The Nest Thermostat will power on and guide you through the initial setup, including:
- Language selection
- Wi-Fi connection
- HVAC system configuration (heating, cooling, fan)
- Location and time zone
3. Using Your Google Nest Thermostat: Daily Operation & Smart Features
Your Nest Thermostat is designed for intuitive control and smart energy management.
3.1 Nest Thermostat Basic Controls
- Adjusting Temperature: Turn the outer ring clockwise to increase temperature, counter-clockwise to decrease.
- Accessing Menu: Press the display to open the main menu.
3.2 Understanding Nest Thermostat Modes
- Heat: Heats your home to the set temperature.
- Cool: Cools your home to the set temperature.
- Heat-Cool: Maintains a temperature range, automatically switching between heating and cooling.
- Off: Turns off your HVAC system.
3.3 Nest Thermostat Scheduling & Learning Features
- Auto-Schedule: Nest learns your preferred temperatures and creates a schedule automatically. The more you use it, the smarter it gets.
- Manual Schedule: You can also create and edit your schedule manually via the thermostat or the Google Home app.
3.4 Nest Thermostat Energy Saving Features
- Eco Temperatures: Nest can automatically switch to energy-saving temperatures when you're away.
- Home/Away Assist: Uses sensors and your phone's location to detect if you're home or away, adjusting temperatures accordingly.
- Energy History: View how much energy you've used and why, helping you make smarter choices.
4. Troubleshooting Common Nest Thermostat Issues
Here are solutions to some common problems you might encounter with your Nest Thermostat.
4.1 Nest Thermostat Won't Turn On / No Power
- Check breaker: Ensure the power to your HVAC system is on at the breaker.
- Check wiring: Verify all wires are securely connected to the correct terminals on the Nest base.
- C-wire: If you don't have a C-wire, the battery might be drained. Try charging it via a micro-USB cable for 30 minutes, then reattach.
- Blown fuse: Your HVAC system's control board might have a blown fuse. Consult an HVAC professional.
4.2 Wi-Fi Connection Issues / Keeps Disconnecting
- Router proximity: Ensure your Wi-Fi router is close enough to the thermostat.
- Restart router: Power cycle your Wi-Fi router and modem.
- Restart Nest: Go to Settings > Reset > Restart on your thermostat.
- Check Wi-Fi interference: Other devices might be interfering with the signal.
- Network settings: Ensure your Wi-Fi network is 2.4GHz (Nest does not support 5GHz).
4.3 Heating/Cooling Issues (Not Heating/Cooling Properly)
- Check mode: Ensure the thermostat is in the correct mode (Heat, Cool, or Heat-Cool).
- Schedule conflicts: Check your schedule for unintended temperature changes.
- HVAC system issues: The problem might be with your HVAC system itself (e.g., clogged filter, low refrigerant, faulty furnace).
- Safety temperatures: Nest has safety temperatures to prevent pipes from freezing or overheating. Check if these are active.
4.4 Battery Issues (Not Holding Charge)
- C-wire: The most common cause is a missing or improperly connected C-wire. Consider installing one or having a professional do it.
- Power stealing: If no C-wire, Nest may try to draw power from other wires, which can lead to intermittent power.
- HVAC system short cycling: If your HVAC system is short cycling, Nest might not get enough consistent power.
4.5 Error Codes
Nest Thermostats can display various error codes. Here are some common ones and what they mean:
- E74: No power to the R wire. Check wiring and breaker.
- E103/E104: No power to the Y1 wire. Check wiring and HVAC system.
- N26: Wi-Fi connection issue. Try restarting your router and Nest.
- E298: Heating/cooling system not responding. Could be wiring or HVAC issue.
For a full list of error codes, refer to the user manual you can download bellow
5. Frequently Asked Questions (FAQ)
How do I reset my Nest Thermostat?
To reset your Nest Thermostat, go to Settings > Reset > All Settings on the thermostat display. Confirm your choice. This will erase all your settings, schedule, and learned data, returning it to factory defaults.
Does the Nest Thermostat require a C-wire?
While the Nest Thermostat can often operate without a C-wire by 'power stealing,' it is highly recommended to have a C-wire for consistent power and optimal performance. Without a C-wire, you might experience battery drain issues or intermittent power to your thermostat.
Can I control my Nest Thermostat from my phone?
Yes, you can control your Nest Thermostat remotely using the Google Home app on your smartphone or tablet. The app allows you to adjust temperatures, change modes, view energy history, and manage schedules from anywhere with an internet connection.
How does the Nest Thermostat save energy?
The Nest Thermostat saves energy through several features: its Auto-Schedule learns your preferences and adjusts temperatures automatically; Home/Away Assist uses sensors and your phone's location to set energy-saving temperatures when you're away; and Eco Temperatures automatically switch to energy-efficient settings.
What do the different colors on my Nest Thermostat mean?
The Nest Thermostat uses different colors to indicate its status: Blue means cooling, Orange means heating, Green means Eco Temperatures are active, and Black/Grey typically means it's off or in standby mode. A blinking light usually indicates a power or connection issue.
Download Google Nest Thermostat GA01334-US, GA02033-US User Manual
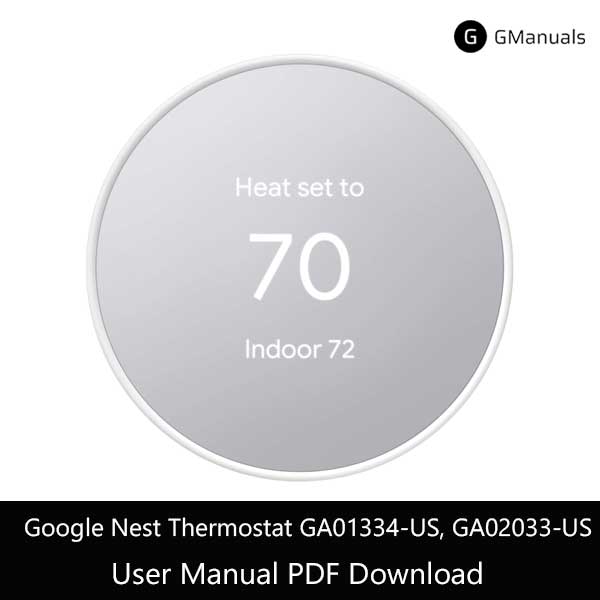
| Brand | Google Nest |
| Model | Thermostat GA01334-US, GA02033-US |
| Category |
Thermostat |
| File Size | 450 Kb |
| Pages | 20 Pages |
| Language | English |
| 1175 views | |
Conclusion
Your Google Nest Thermostat is a powerful tool for managing your home's comfort and energy consumption. By understanding its features, proper installation, and basic troubleshooting, you can maximize its benefits. Remember to regularly check your energy history and adjust settings as needed to optimize both comfort and energy savings.
Additional Resources
- Official Nest Support: Visit the Google Nest support website for the latest updates and troubleshooting guides.
- Google Home App: Download the app for remote control and advanced scheduling features.
- Professional Installation: If you're uncomfortable with any installation steps, consider hiring a certified HVAC technician.
This guide covers the most common scenarios and issues. For specific technical problems or warranty concerns, always refer to the official Google Nest documentation or contact their support team.
This site is not affiliated with Google LLC. Nest is a trademark of Google. All product names, logos, and brands are property of their respective owners.
I do not know whether it's just me or if perhaps everyone else encountering problems with
your website. It appears as if some of the text in your content are running off the screen. Can somebody else please comment
and let me know if this is happening to them too?
This might be a issue with my browser because I've
had this happen before. Appreciate it